Getting Started
SiteSpry helps you turn documents into shareable links, help pages, and an embeddable AI chatbot—fast. Get started in three simple steps.
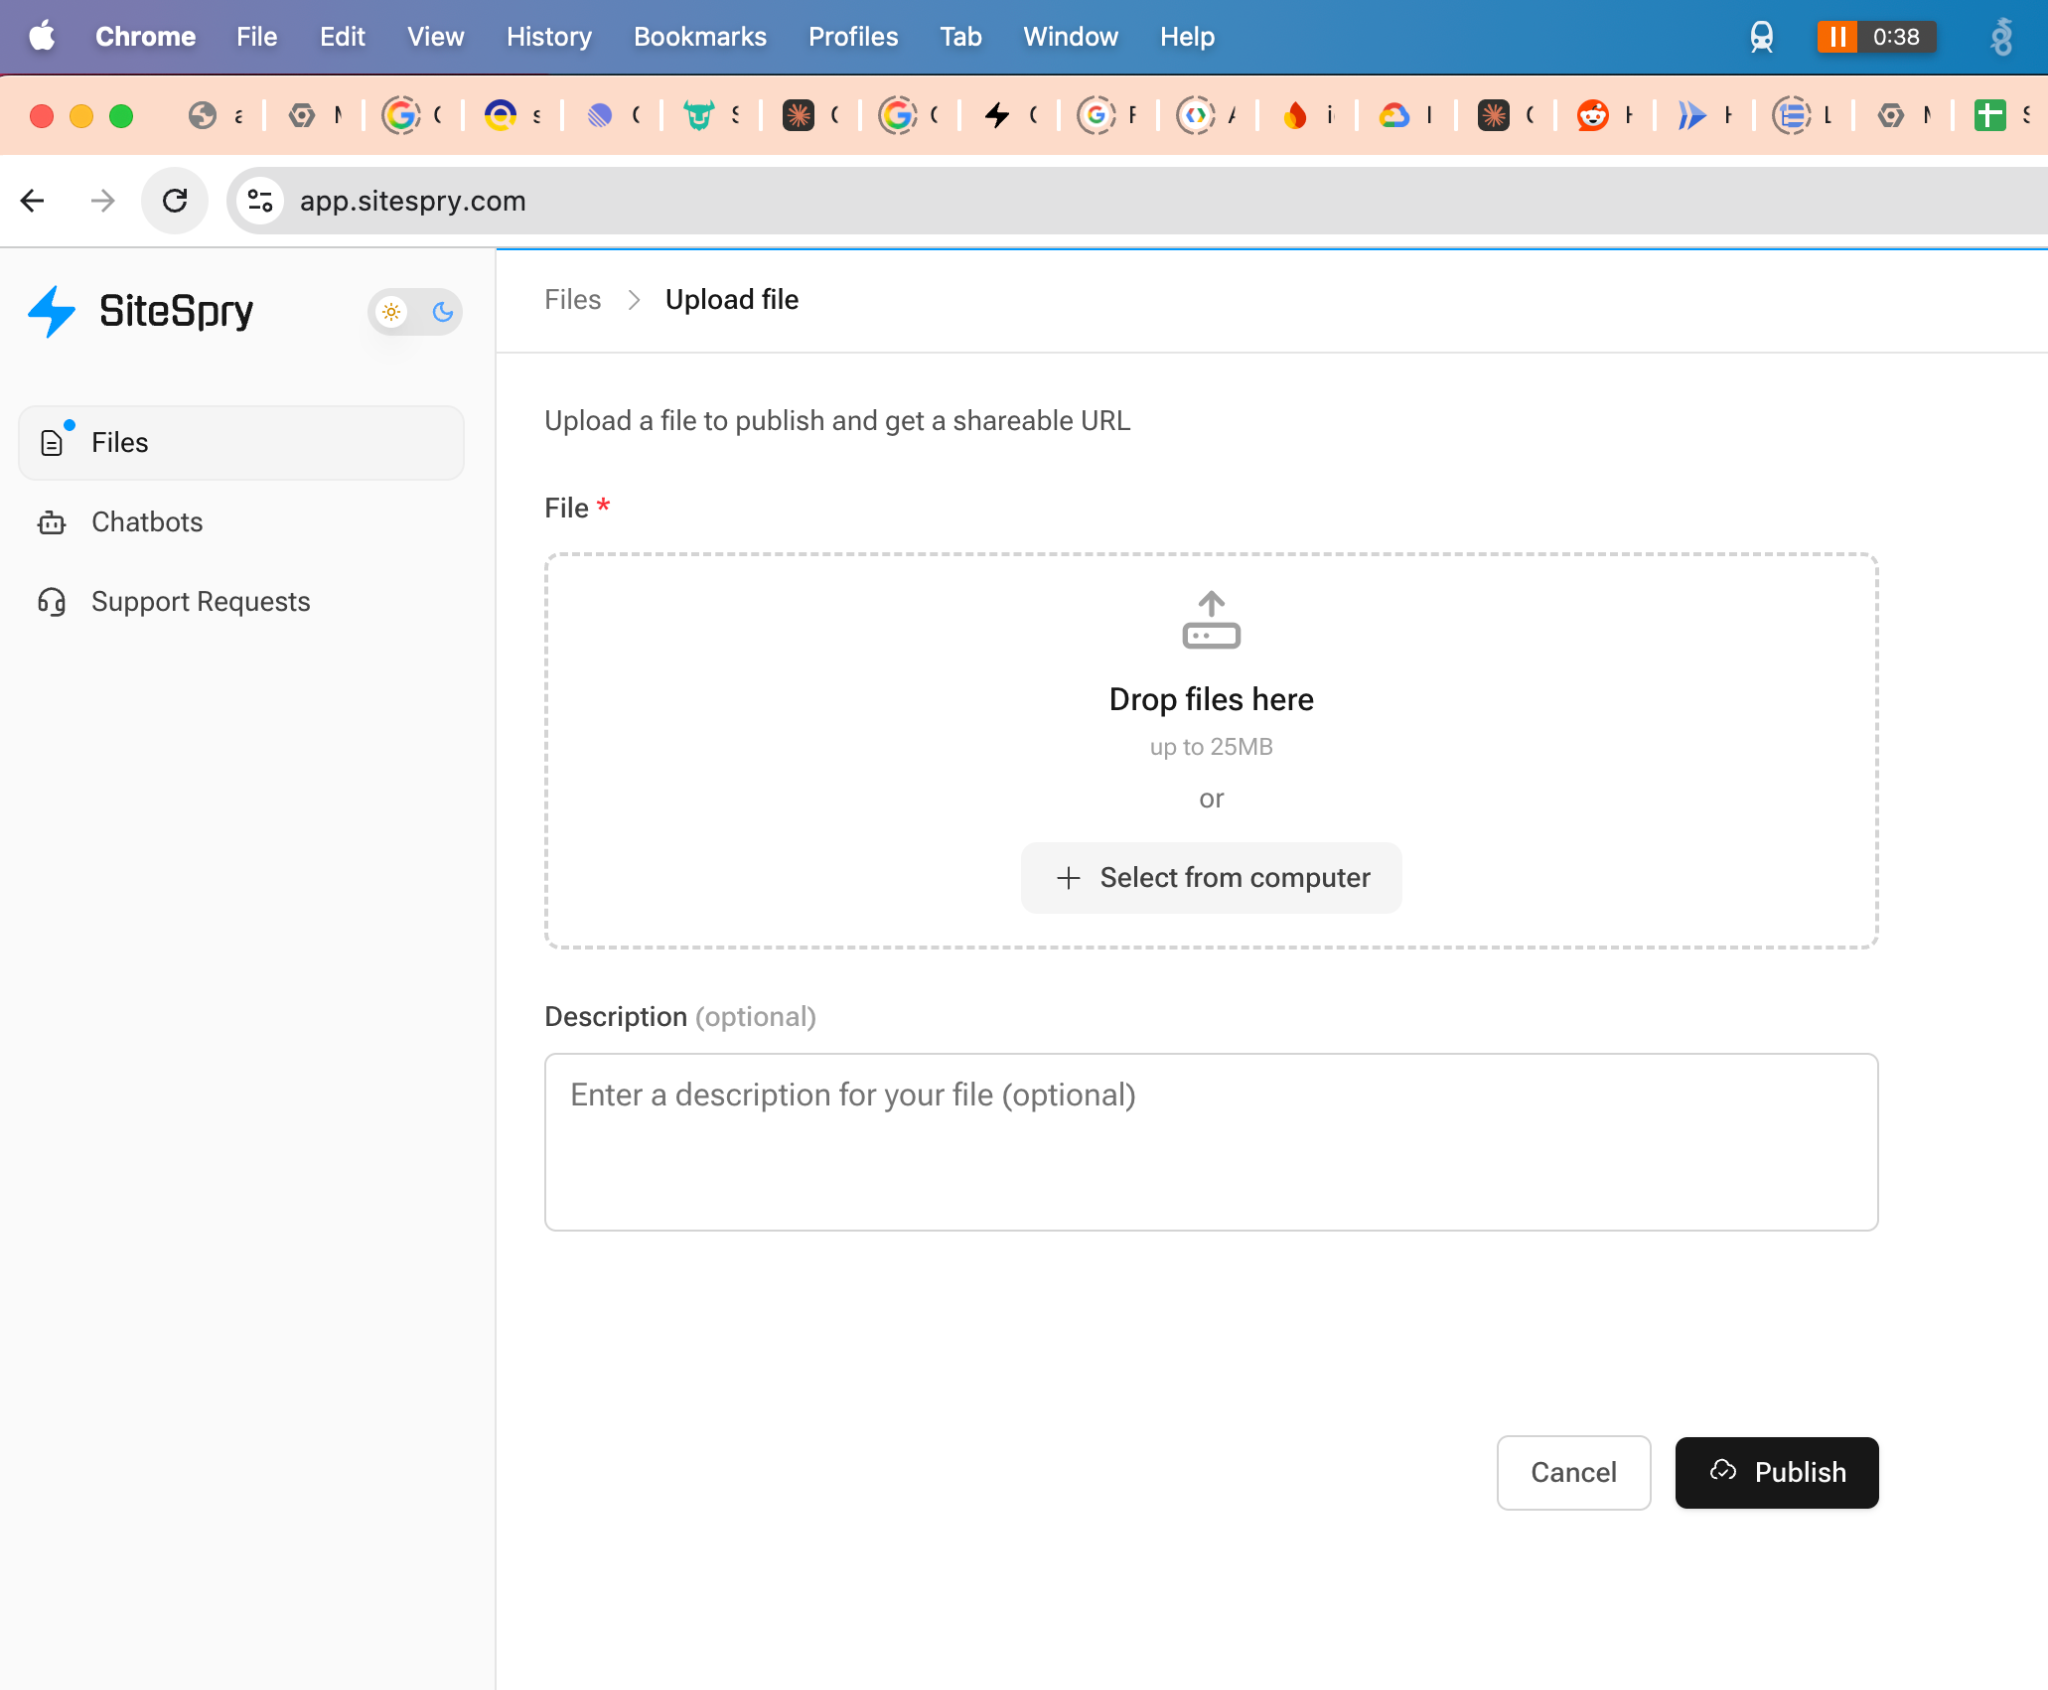
1 Upload a file
-
1.
Sign in at
https://app.sitespry.com/sign_in - 2. Navigate to Files in the left sidebar
- 3. Click the Upload file button in the top right
- 4. Drag & drop your file or click Select from computer
- 5. (Optional) Add a description to help identify your file
- 6. Click Publish to upload
Supported file types:
Important
Uploading a file publishes it to the internet and makes it accessible via a shareable link. Do not upload sensitive or confidential content.
2 Share your file link
After uploading, your file will be processed in two stages:
Initial processing (~5 minutes)
File becomes "Ready" and the shareable link is generated
AI processing (1+ hours)
SiteSpry's AI generates FAQs and help articles based on file content
To configure and share your file:
- 1. Go to Files and locate your uploaded file
- 2. Wait for the status to change from "In process" to Ready (green indicator)
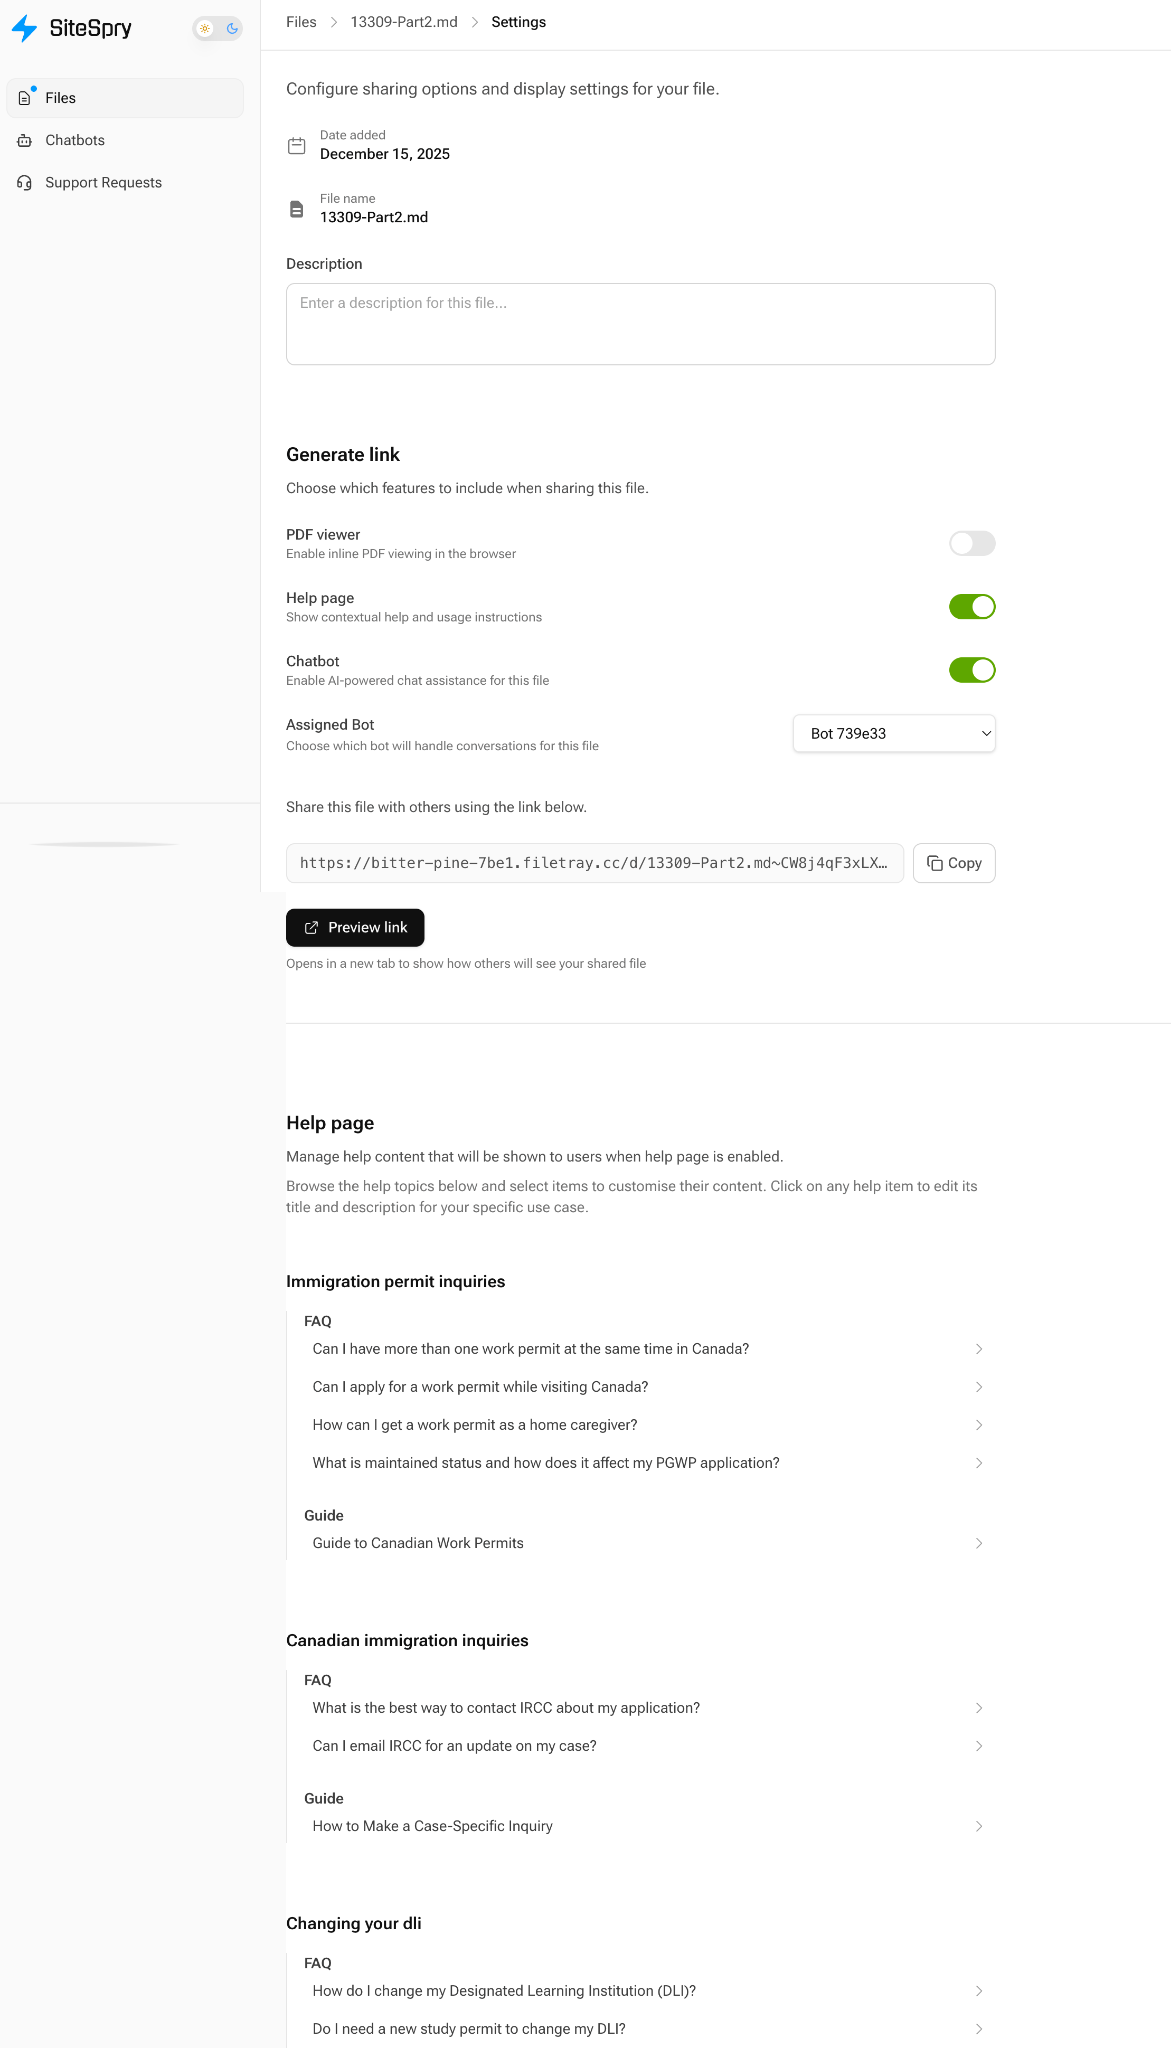
- 3. Click Settings next to your file
-
4.
Under Generate link, choose what the public page includes:
- • PDF viewer: Enable inline PDF viewing in the browser (PDF files only)
- • Help page: Show auto-generated FAQs and articles on the share page
- • Chatbot: Display an AI assistant widget on the share page
- 5. Select an Assigned Bot (the chatbot that will handle conversations for this file)
- 6. Copy the shareable URL or click Preview link to see the public page
3 Embed the chatbot on your website
To add a chatbot widget to your website:
- 1. Navigate to Chatbots in the left sidebar
- 2. Select your chatbot from the list
- 3. Click Settings
- 4. In the Widget Preview section on the right, you'll see the Embed Code
- 5. Click Copy to copy the embed code
-
6.
Paste the script into your website's HTML (typically inside the
<head>tag or before the closing</body>tag) - 7. Publish your website changes
That's it! Your chatbot will now appear on your website and can answer visitor questions 24/7 while capturing leads through Support Requests.
Next steps
Learn about Files
Manage uploads, configure sharing, and curate AI-generated content
Create custom Chatbots
Configure knowledge sources and customize your chatbot
Handle Support Requests
Manage customer inquiries and convert leads
Security & Privacy
Critical guidelines for protecting sensitive information